Your cash plan's checking account
Semi-automatic balancing of your monthly checking account statement can be done in You Need A Cash Plan with a file of transactions downloaded from your bank or credit union's website.
Once you start balancing a checking account statement, do not close You Need A Cash Plan until you have finished.
Log into your bank or credit union's website. Download the transactions for the statement being balanced in .CSV format.
Banks and credit unions generally do not group checking account transactions by statement the way that credit card companies do. The filter for the download of transactions from your bank or credit union must, therefore, have a start date that is well before the date of the statement to ensure that all needed transactions are downloaded. Using the first of the month before the statement date usually works.
For example, to download transactions for a statement dated October 26th, you would use a filter start date of September 1st. This works unless you have an old check that the payee has not yet cashed that is dated before your filter start date. When this happens, the filter start date for the download is the date of that old check.
Display the checking account statement as a PDF in a separate browser tab so that you can refer to the statement without having to stay logged in to your bank or credit card website.
Log out of your bank or credit union's website.
The first time that you use a downloaded transaction file to balance your checking account you must first create a transaction file map for your bank or credit union's .CSV transaction file. A transaction file map is created only once and not changed unless the bank or credit union changes the format of their .CSV download file.
Review the checking account statement to see if there are any new account charges, fees, or earned interest that have not yet been entered in your cash plan.
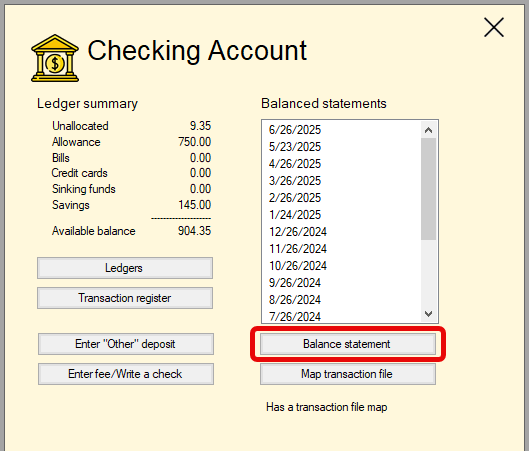
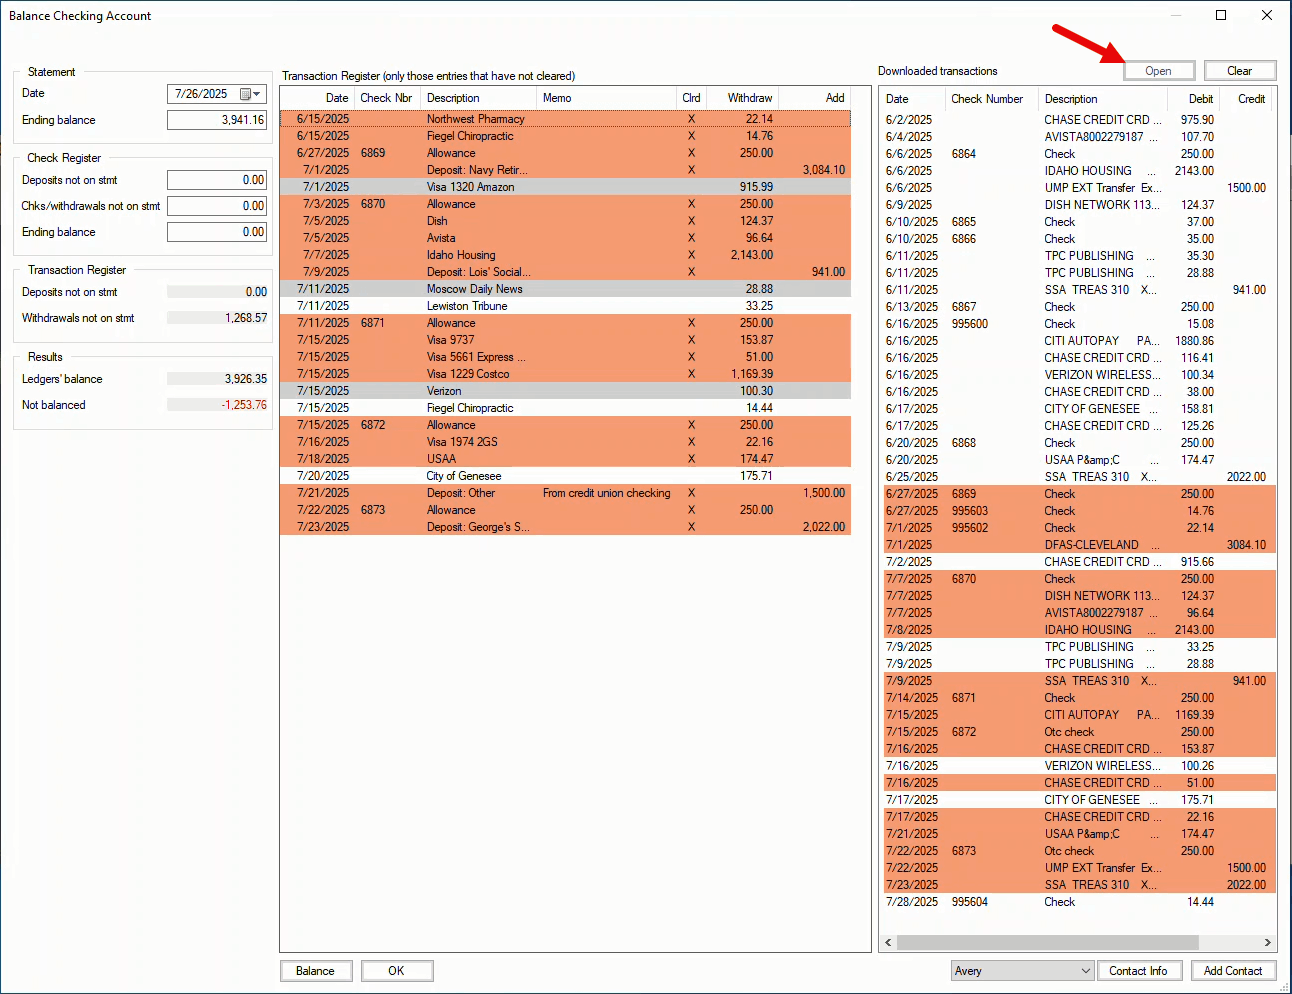
In the Checking Account slider, click on the Balance statement button to open the Balance Checking Account window.
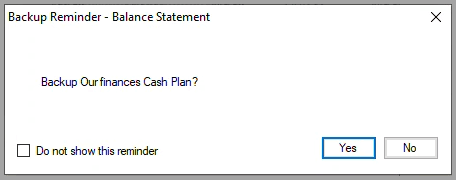
If the backup reminder option is turned on, in the Backup Reminder message box, either click on the Yes button to take a backup of the open cash plan or click on the No button.

If you have recently began using You Need A Cash Plan, you may have a left over manual or digital check register that you used prior to getting started with the program. The deposits and withdrawals in your residual check register that have not yet appeared on a statement are handled in this step each month until all of the entries have been cleared.
In your residual check register:
In the Balance Checking Account window's Check Register box:
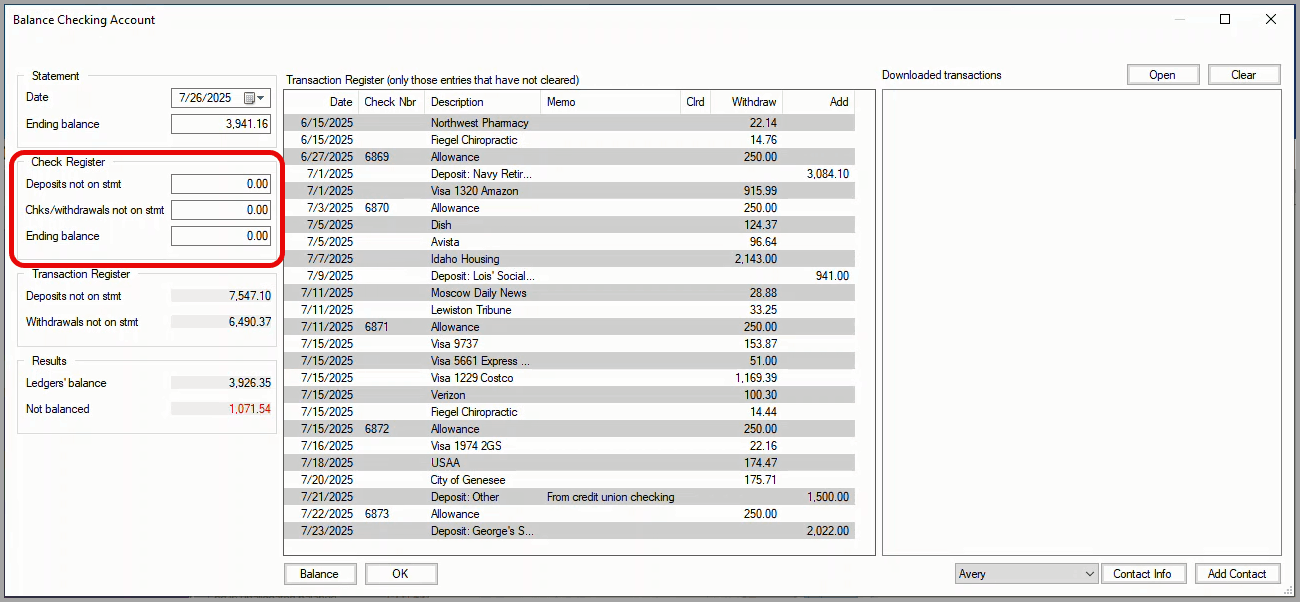
Click on the Open button to find and display the downloaded transaction file. You may have to widen the window in order to view all of the downloaded information.
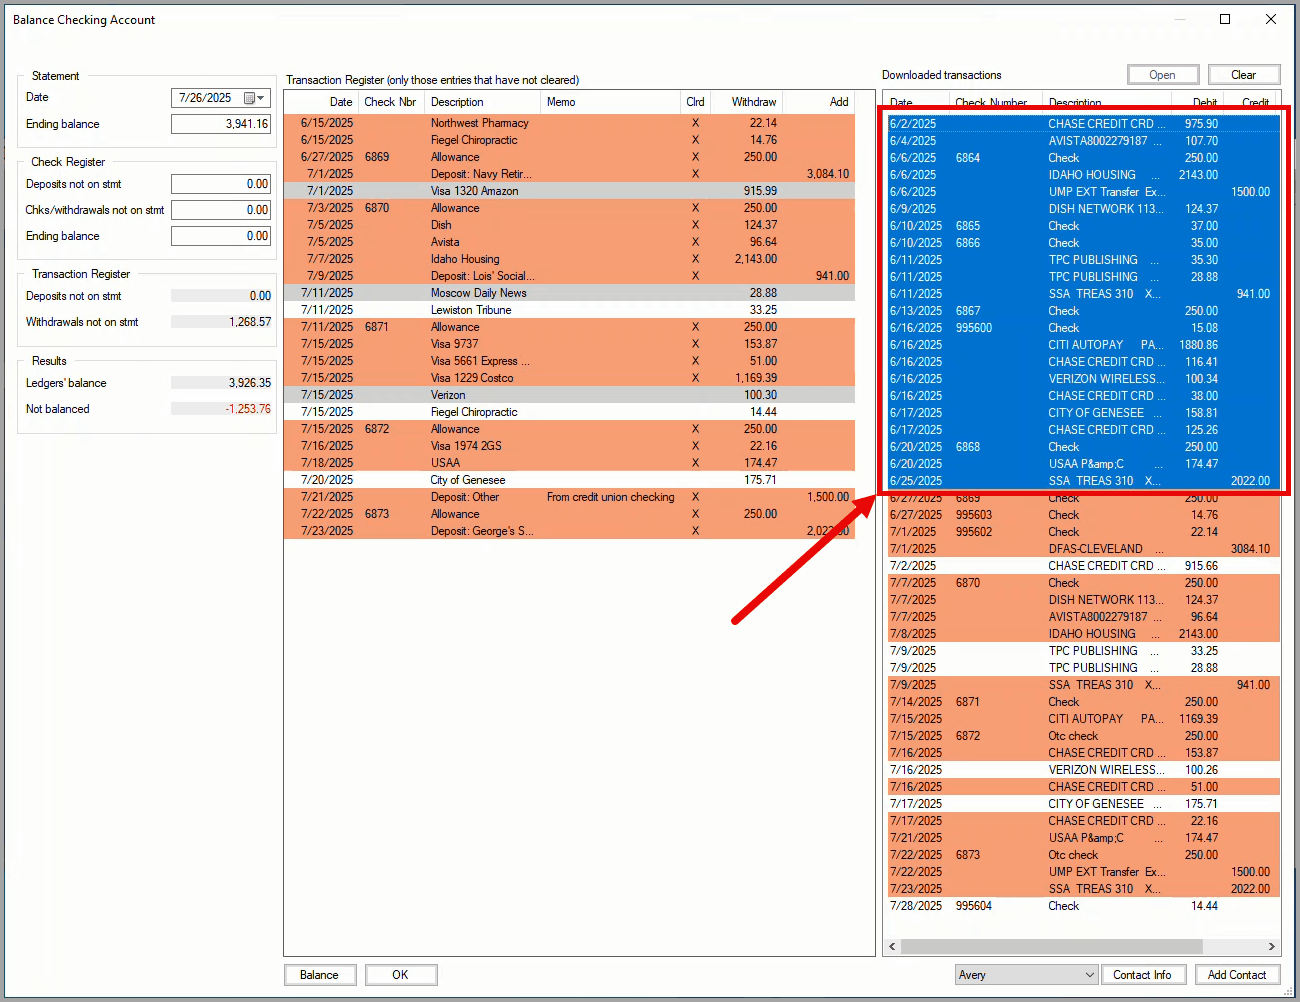
Delete the previously cleared transactions
Select all of the downloaded transactions at the top of the list that were previously cleared and press the Delete key.
In this step you reconcile any differences between the two lists: your transaction register on the left and the bank or credit union's statement on the right.
It's impossible to predict the types of issues you will encounter when balancing your credit card statement. The main points to remember are that an error in the left list is yours to fix or accept in your cash plan while an error on the right is to be discussed with your bank or credit union as soon as possible.
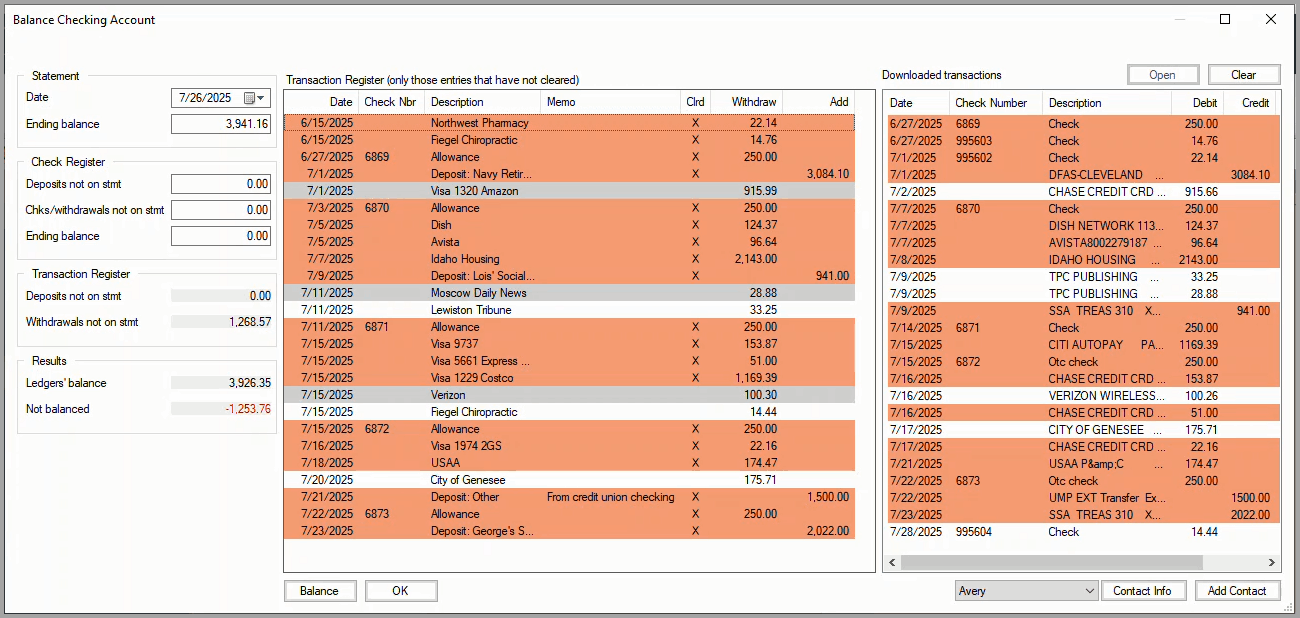
In this example, all but one of the items on the left that are not selected as cleared (not highlighted) either have slightly different amounts or the dates are different from the statement. The one exception is the check for 14.44 which is dated after the statement date and, therefore, is not included in this statement. It could be deleted from the right list.
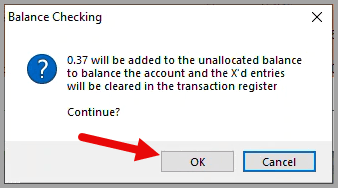
To complete balancing in this example, all of the non-highlighted rows on the left (except the check for 14.44 which will appear on the next statement) are double-clicked to mark them as cleared. Note that the Not balanced amount has been reduced to 37 cents which is an acceptable out-of-balance amount considering the small amount differences between the statement and the transaction register items.
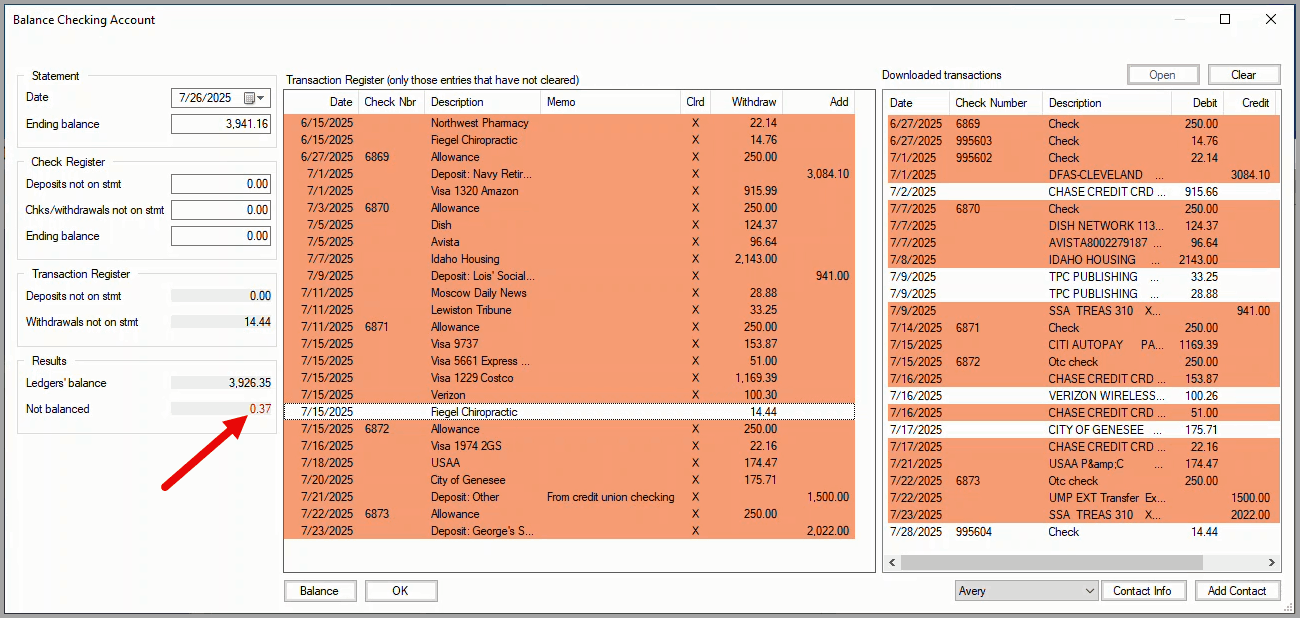
For this example, you complete balancing by clicking on the Balance button. When you want to try and figure out why there is a Not balanced amount, you can refer to these suggestions.

The Balance Checking message box shows what will happen to complete the balancing. Click on the OK button.