Here's what you know about the bill.
To add this bill, begin by opening the New Bill window as described in How to start an Add.
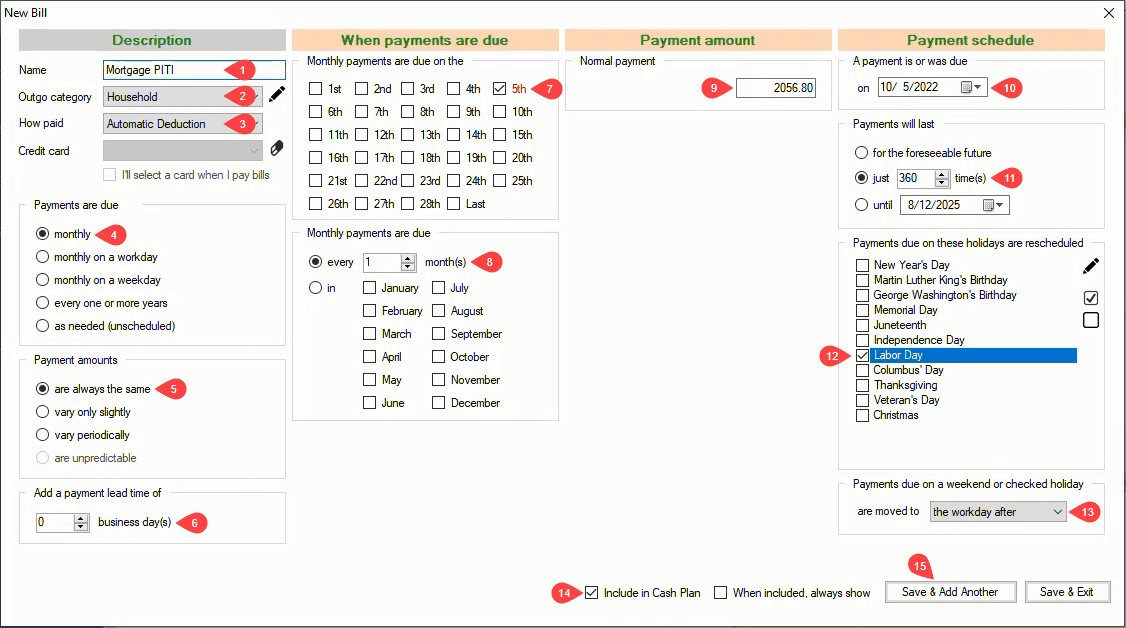
In the New Bill window:
1 Name - Enter a descriptive Name for the bill. (In this example, PITI means payment, interest, taxes, interest)
2 Outgo category - Select the Outgo category that applies. The default value Household in this example applies to this bill.
3 How paid - Select Automatic Deduction.
4 Payments are due - The default monthly option applies.
5 Payment amounts - The default are always the same applies.
The four columns in the New Bill window are now configured correctly for the new bill.
6 Add a payment lead time of - With the payments being automatically deducted, there is no need for a lead time.
7 Monthly payments are due on the - Check the 5th.
8 Monthly payments are due - The default every 1 month(s) applies.
9 Normal payment - Enter 2056.8.
10 A payment is or was due on - Select the date of the first mortgage payment.
11 Payments will last - Select just 1 times and change the number to 360.
12 Payments scheduled on these holidays are rescheduled - Check Labor Day.
13 Payments due on a weekend or checked holiday are moved to - The default the workday after applies.
14 Include in Cash Plan - This option is checked by default which is correct for this bill.
15 Save & Add Another / Save & Exit - Click on either save button to save the new bill.

The bill is added to your cash plan
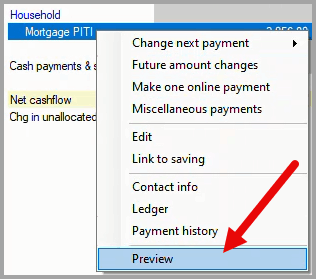
To verify that the bill has been added correctly, right-click on the bill in your cash plan to open the drop-down menu and click on Preview.
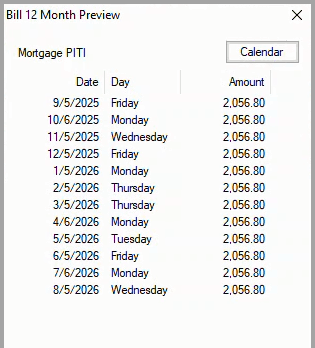
The Bill 12 Month Preview dialog box displays the calculated payment Date, Day and Amount for the next twelve months. If needed, click on the Calendar button to display the reference calendar to check the calculated dates.
If any of the calculated values in the Date or Amount columns are incorrect, right-click on the bill in your cash plan to open the drop-down menu and click on Edit to make corrections.